LiDAR (Light Detection and Ranging) has moved from a specialized remote-sensing technology into a practical, jobsite-ready tool that helps construction teams measure reality, fast. By capturing millions of precise distance measurements in minutes, LiDAR produces a highly detailed 3D dataset of existing conditions and in-progress work. That dataset becomes the foundation for better planning, tighter coordination, and fewer surprises in the field.
At a time when schedules are compressed and tolerances are unforgiving, LiDAR gives teams a measurable “source of truth” they can use from preconstruction through closeout.
What Is LiDAR Scanning and Why It Matters for Construction
LiDAR works by emitting laser pulses and measuring the time it takes for those pulses to reflect off surfaces and return to the sensor. The result is a dense set of spatial data points, known as a point cloud, that represents the scanned environment in 3D.
In construction, LiDAR matters because it:
- Captures as-built conditions with high accuracy and rich detail
- Reduces site revisits by collecting far more information than manual point-by-point methods
- Supports faster decisions in estimating, coordination, and quality control
- Creates a permanent record of what’s actually in place
Common LiDAR scanner types used in construction
Construction teams typically deploy LiDAR through four primary platforms:
- Airborne LiDAR (mounted on drones or aircraft) for large outdoor sites and corridors
- Stationary terrestrial scanners (tripod-based) for high-detail interiors and critical areas
- Mobile terrestrial systems (vehicle-mounted) for streetscapes, facades, and large exteriors
- Handheld scanners for quick capture in tight or hard-to-reach spaces
Accuracy depends on the platform, scanning distance, control network, and registration method. In practice, teams use LiDAR because it captures complete context—not just a handful of points.
LiDAR vs Traditional Surveying: Speed, Accuracy, and Cost
Traditional surveying tools (total stations, GNSS, and manual measurement) remain essential, especially for control points and boundary work. But on many projects, LiDAR adds speed and completeness that traditional methods can’t match.
Speed
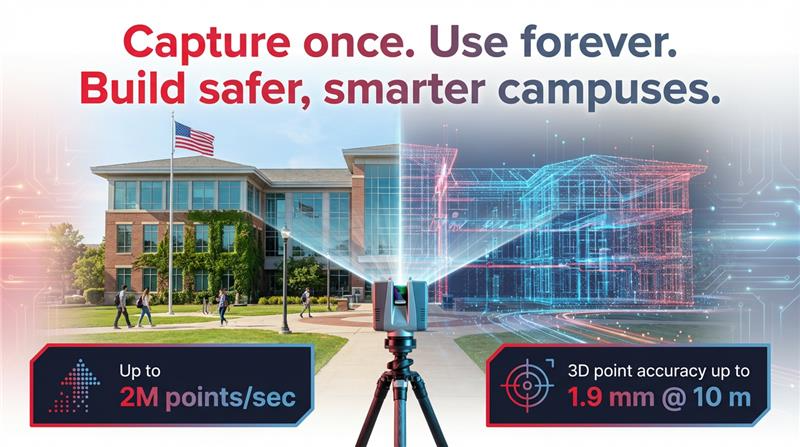
LiDAR collects thousands to millions of points per second, making it ideal for capturing complex geometry quickly. Large areas that can take days using conventional point collection can often be scanned in hours, reducing jobsite time and disruption.
Accuracy
- Traditional surveying excels when you need highly precise measurements at a limited number of points.
- LiDAR excels when you need dense, continuous coverage that captures everything structure, MEP, terrain, and surrounding context.
Most modern construction LiDAR workflows achieve survey-grade alignment when planned correctly (good scan plan, targets/control, proper registration).
Cost
Traditional surveying often has a lower upfront equipment and mobilization cost. LiDAR may cost more initially, but it frequently pays back through:
- Less field time and fewer return visits
- Earlier issue detection and fewer RFIs driven by unknowns
- Reduced rework caused by measurement gaps
Best practice on many projects: use traditional surveying for control and benchmarks, then use LiDAR for full-scene capture and model validation.
How LiDAR Fits Into Modern Construction Workflows
LiDAR strengthens digital delivery because it connects physical reality to digital models, consistently.
- Capture existing conditions (Survey / Reality Capture)
Scan site conditions, structural elements, and MEP environments before design finalization or before installation. - Process and register point clouds
Combine scans into a single coordinate system, clean noise, and prepare deliverables (e.g., RCP/RCS, E57, LAS/LAZ). - Scan-to-BIM and coordination
Convert the registered point cloud into BIM geometry where needed, or overlay point clouds in coordination tools to verify clearances. - QA/QC and deviation analysis
Re-scan during construction and compare new scans to the design model to detect deviations early. - As-built documentation / digital twin foundation
At closeout, final scans create a high-confidence record of installed conditions for owners and facility teams.
This workflow reduces uncertainty, improves coordination between trades, and provides measurable evidence for quality and progress.
What Are the Top Use Cases of LiDAR Scanning in Construction?
LiDAR is most valuable where complexity is high, access is limited, or tolerances are tight. Common jobsite applications include:
- Preconstruction existing conditions: capture buildings, rooms, and site constraints before design or estimating decisions are locked.
- Topographic mapping and earthwork validation: verify grading, slopes, and volumes with confidence.
- Structural verification: check slab flatness, column alignment, embeds, openings, and steel positioning.
- MEP coordination: validate clearances and installation zones, especially in dense ceiling spaces.
- Progress tracking: compare scans over time to document installed work and support pay applications.
- Renovations and retrofits: reduce surprises behind walls and above ceilings by modeling what exists.
- As-built handover: provide owners with accurate locations of systems and key assets.
Complex facilities, such as healthcare, industrial plants, and data centers, often see the fastest returns because even small deviations can trigger cascading rework.
How Do Contractors Convert a LiDAR Point Cloud Into a BIM Model?
Converting a point cloud into BIM (often called Scan-to-BIM) is a structured process that turns raw scan data into a model teams can use for coordination, fabrication planning, and verification.
Typical Scan-to-BIM workflow
- Plan the scan: define scope, accuracy needs, and areas of highest risk.
- Capture + control: scan the space and establish control points (as needed) for survey-grade alignment.
- Register and clean: combine scans, remove noise, and validate alignment.
- Deliver point cloud formats: commonly RCP/RCS (ReCap), E57, or LAS/LAZ.
- Model in BIM software: create Revit (or similar) elements from scan data – walls, slabs, structural, MEP, supports.
- QA/QC validation: check modeled geometry against the point cloud and confirm tolerances.
- Package deliverables: BIM model, views/sections, coordination exports (Navisworks), and any deviation reports.
Key decision: Not every project needs a fully modeled BIM from scans. Many teams get high value by using point clouds directly for coordination and verification, modeling only critical areas.
Quick ROI Snapshot: Accuracy, Time Savings, Rework Reduction
LiDAR’s value is easiest to see in three outcomes:
1) Higher accuracy where it counts
Reality capture reduces assumptions. Teams can verify grades, clearances, and installations against design intent, before problems become permanent.
2) Faster field-to-office cycles
Because scans capture full context quickly, teams spend less time measuring, revisiting, and re-documenting. That speed is especially valuable on fast-track schedules.
3) Rework prevention through early detection
The biggest payoff often comes from finding deviations early, misaligned embeds, incorrect sleeve locations, congested MEP zones, or clearance conflicts, when fixes are still manageable.
If your project has tight tolerances, heavy MEP density, or high cost-of-error, LiDAR typically pays for itself through avoided rework and schedule protection.
Get Started: Checklist and Next Steps
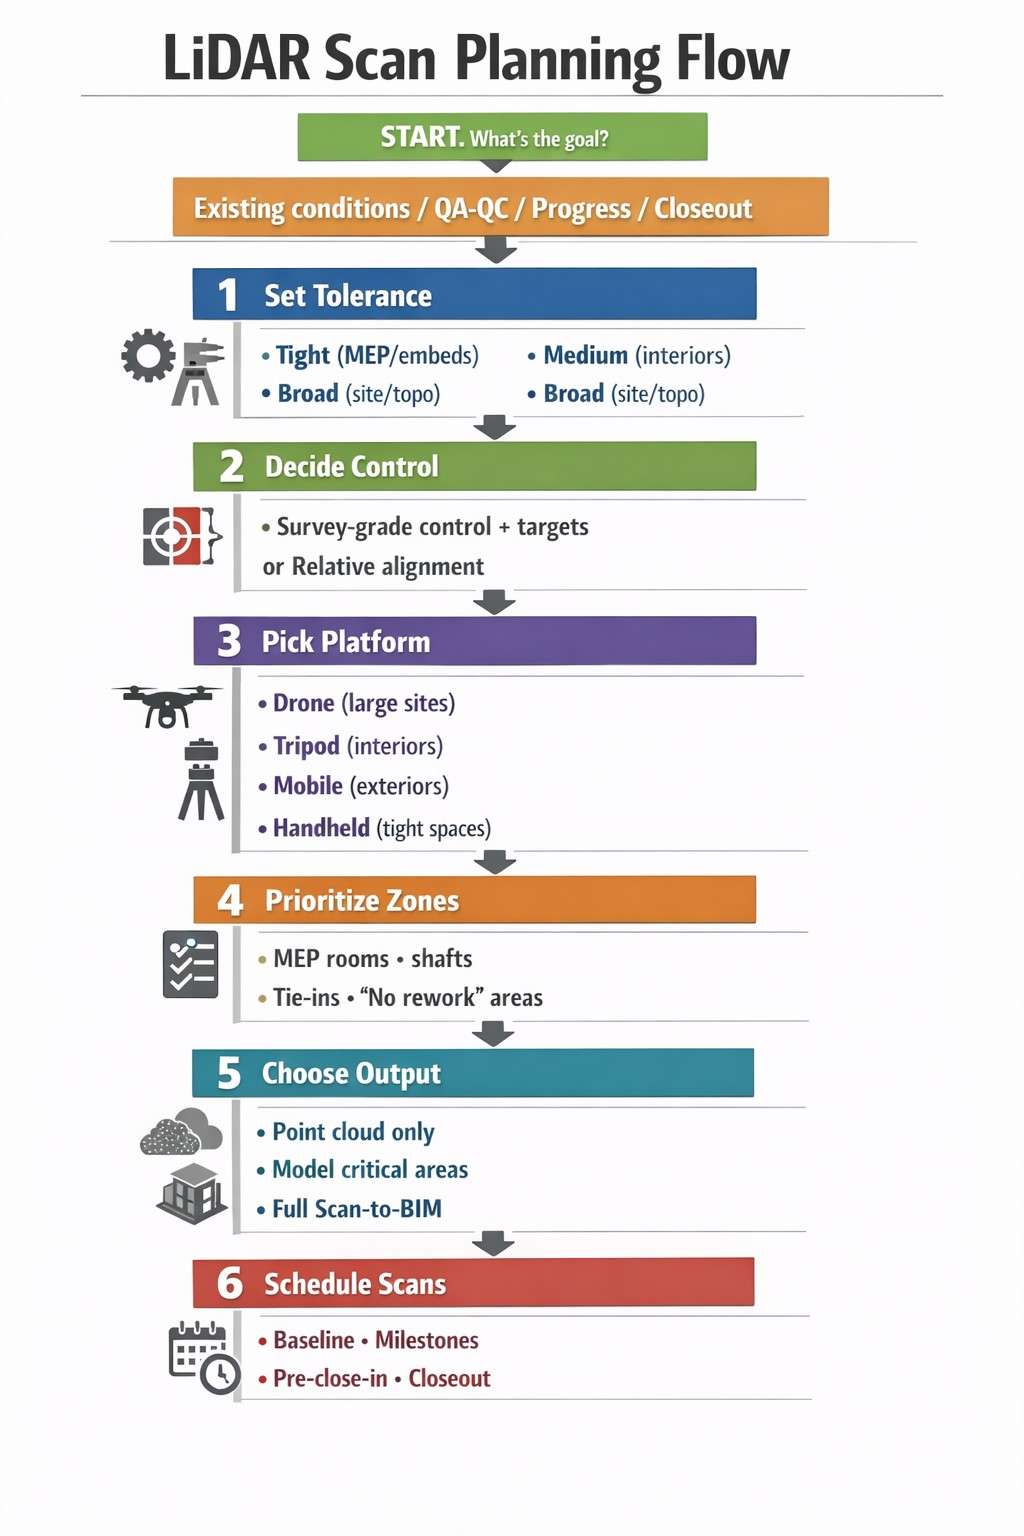
Before deploying LiDAR, align your team on these basics:
- Goal: existing conditions, progress capture, QA/QC, as-builts, or all of the above
- Accuracy requirements: define tolerances and what “good enough” means for the deliverable
- Coverage: prioritize high-risk zones (MEP rooms, critical corridors, tight ceilings)
- Workflow: point cloud only vs. full Scan-to-BIM
- Deliverables: file formats, coordinate system, model LOD, reporting style
- Schedule: when scans occur (precon baseline, milestones, closeout)
Next step: engage a reality-capture partner who understands construction sequencing, coordination, and QA, not just scanning.