Laser scanning dimensional inspection has transformed defect detection in manufacturing. Modern 3D laser scan systems can now achieve accuracy within single-digit microns. This remarkable precision helps identify defects the human eye cannot see, such as tiny dents, warping, and incorrect part dimensions.
Table of Contents
ToggleThe construction industry’s adoption of 3D scanning technology has jumped 57% over the last several years.
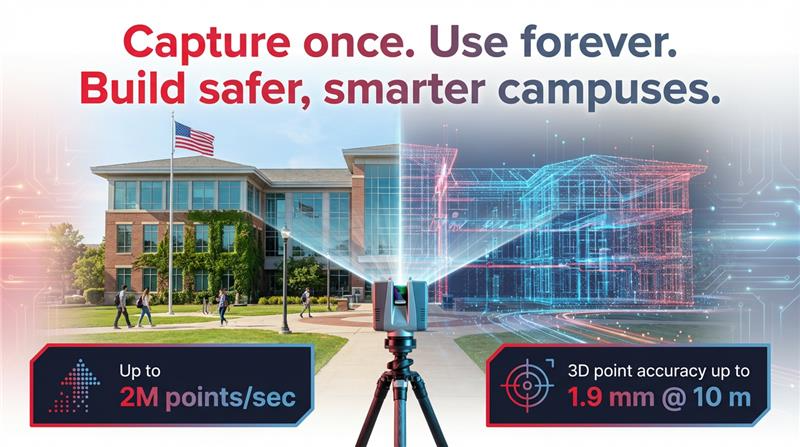
The value of industrial laser scanners in manufacturing comes from their exceptional capabilities. These 3D measurement systems capture two million data points every second and measure hard-to-reach areas with 2-4mm accuracy.
3D laser scanning measurement systems excel at error detection and quality assurance in industrial applications of all types. The automotive sector depends on this technology’s precise engineering and customized component measurements. Most industrial laser scanning systems can process thousands of profiles each second to meet manufacturing needs. This detailed guide explores how 3D laser scanning makes factories more efficient, accurate, and competitive through its execution, tools, and industrial applications.
Tools & Technologies Used in Factories
The world of industrial laser scanning has tools of all types, each built to handle specific manufacturing needs. You’ll find four main types of scanning devices in this technology space, each with its own accuracy levels and size capabilities.
Scanner Type | How It Works | Example Models | Accuracy / Range | Key Features & Advantages | Ideal Applications |
Structured Light Scanners | Cast patterned light grids onto objects; cameras capture deformation to reconstruct 3D geometry. | ZEISS ATOS Q, GOM Scan 1 | Up to 25 microns or better | Ultra-high precision; excellent for small and complex shapes; rapid data capture. | 3D inspection, quality assurance, product design, precision manufacturing. |
Laser 3D Scanners | Project laser lines across surfaces; measure reflected light via triangulation to compute 3D points. | ZEISS T-SCAN hawk 2 | High precision, depending on system | Performs well under variable lighting; great for diverse materials and environments. | Industrial inspection, reverse engineering, metrology. |
LiDAR Scanners | Emit laser pulses to measure distances by timing reflected light; map large spaces in 3D. | Artec Ray, FARO Focus | Up to 400–500 meters, submillimeter accuracy | Long-range capture; Hybrid Reality Capture (FARO); ideal for large-scale environments. | Plant scanning, facility digitization, infrastructure and construction. |
Portable Handheld Scanners | Compact systems that capture data wirelessly or via cable; integrate multiple scanning modes. | ATLASCAN Max, MARVELSCAN | Variable precision, suited for field use | Wireless operation; flexible for tight or hard-to-reach spaces; on-site measurement capability. | Onsite inspections, field measurements, quick verification. |
Modern Laser Scanning Systems (Software Integration) | Combine scanning with automated calibration, environmental monitoring, and instant reporting. | Integrated in many new-generation systems | Varies by model | Real-time calibration feedback; environmental shift detection; seamless inspection-to-report workflow. |
|
Applications of 3D Laser Scanning in Manufacturing
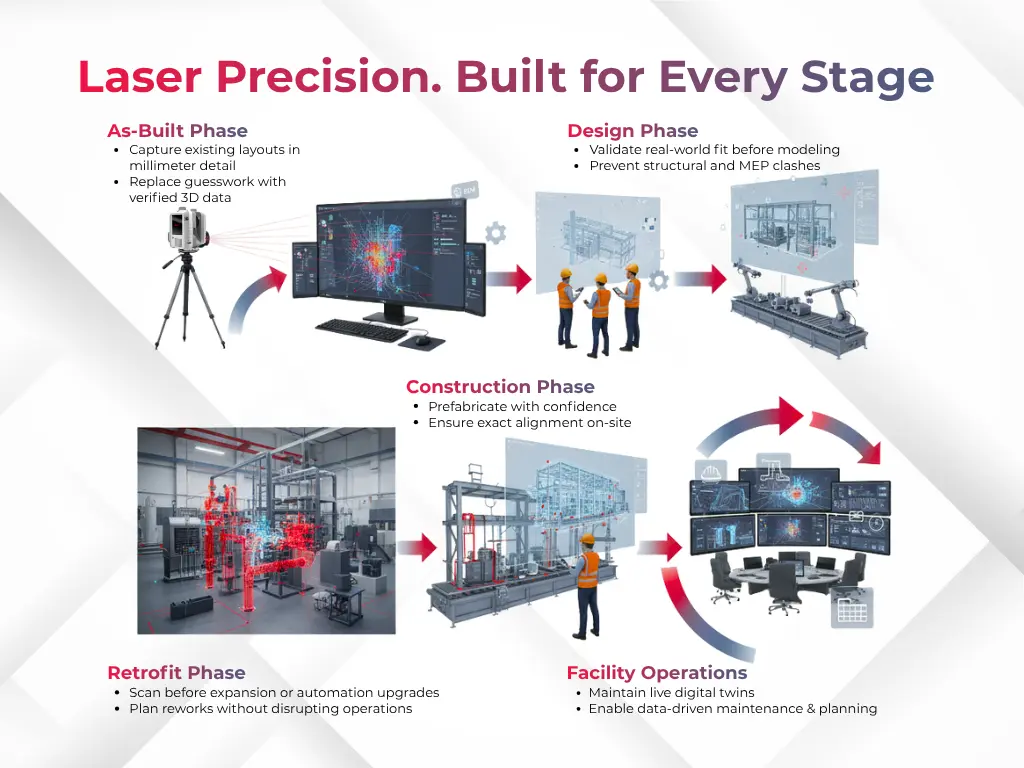
3D laser scanning has evolved beyond simple dimension capture to become an essential part of production workflows at the time of manufacturing. Manufacturing facilities typically combine these systems smoothly either inline (directly within production lines) or near-line (adjacent to main operations). This setup enables continuous quality verification without disrupting production flows.
- Quality assurance stands as the primary application of laser scanning dimensional inspection in factories.
- Modern systems excel at detecting microscopic imperfections that human inspectors cannot see. These include subtle dents, warping, and dimensional discrepancies in manufactured parts.
- This capability proves valuable in automotive manufacturing, where technicians can inspect newly modernized components and detect unexpected issues like motor wobbling in moving assemblies.
- Reverse engineering represents another crucial application that lets manufacturers recreate parts without original CAD files.
- A company’s experience highlights this value. The team employed 3D laser scans to learn why a replacement mold needed about 50% more material than its predecessor.
- They found key differences in geometry through precise comparison between original and new parts. This discovery led to design modifications that reduced material usage and lowered per-part costs.
Laser scanners serve multiple functions in aerospace manufacturing:
- Locating microscopic cracks and pores in critical components via CT scanning
- Developing virtual models for digital aerodynamic testing
- Digitizing component parts for modernizing
- Many manufacturers have integrated scanning systems directly into production lines, which speeds up inspection processes dramatically.
- This approach enables quick identification, diagnosis, and resolution of quality issues without removing parts from the production environment.
- Manufacturing teams can compare scan data against original CAD models immediately to assess how well each component meets quality standards.
- LiDAR scanners have become indispensable for production planning and equipment layout.
- They efficiently map facility layouts and help teams implement new production lines with precise spatial awareness. These systems can boost workplace safety by monitoring shared human-robot workspaces.
- They automatically slow or stop robotic operations when team members enter restricted zones.
Start building a sustainable future today. Get free 3D Laser Scanning consultation for your project.
Accuracy & Compliance in Industrial Environments
Accurate measurements are the life-blood of 3D laser scanning applications. Professional laser scanners can achieve accuracy between 0.01mm to 0.1mm. Each application just needs different levels of precision. To cite an instance, construction sites use terrestrial scanners that work with 1-3mm accuracy up to 100 meters away. Manufacturing quality control uses handheld systems that deliver 0.1-0.5mm precision for smaller parts.
- Scanner reliability faces several challenges. Objects with complex details, shiny surfaces, or intricate shapes can trick the scanners. The results also change with temperature shifts, dust, vibration, and different lighting conditions.
- So scanner operators must learn the right way to set up their equipment and read the point cloud data. Manufacturers now rely on time-tested standards to confirm scanning accuracy.
- The ISO 10360-8 framework offers strict testing methods that went together with one another with ISO/IEC 17025 certification to give a reliable measurement system. Different industries have their own rules.
- Pharmaceutical facilities must follow FDA and GMP standards. Construction projects use USIBD Level of Accuracy specifications. Manufacturing quality control follows ASTM E3125-17 standards.
- Premium scanning systems must be calibrated against reference standards regularly to keep measurements accurate. This calibration process is crucial for maintaining the precision of coordinate measuring machines and other 3D measurement systems.
Common Mistakes in Factory Scanning
Category | Common Mistake | Impact / Consequence | Recommended Precaution / Best Practice |
Calibration | Poor or infrequent calibration of scanners. | Leads to measurement errors, distorted scales, and misaligned datasets, especially costly in precision engineering. | Perform routine calibration checks; use certified calibration tools; document calibration records. |
Environmental Conditions | Scanning in areas with temperature fluctuations, dust, vibrations, or uneven lighting. | Causes data noise and loss of scan accuracy; inconsistent results across sessions. | Stabilize scanning conditions; use vibration dampers; control lighting; avoid scanning near windows or moving machinery. |
Scanner Placement & Coverage | Insufficient spatial coverage or incorrect scanner positioning. | Results in data gaps, geometric distortion, and incomplete models, especially in corners or hidden spaces. | Plan scan paths with overlapping coverage; maintain optimal distance from objects; use multiple scanning angles. |
Material Properties | Scanning reflective, transparent, or dark surfaces without proper surface preparation. | Causes inaccurate point data or missing sections in scans. | Apply matte sprays or scanning sprays; adjust laser intensity or scanning mode for material type. |
Data Processing | Over-reliance on automatic noise removal or insufficient data cleaning. | Automatic filtering can erase fine details, while poor cleaning makes files heavy and hard to process. | Use a balanced approach; manually verify cleaned data; apply adaptive filtering techniques. |
Data Security | Inadequate protection of sensitive 3D scan data and digital twin models. | Risk of data breaches or unauthorized access, especially when using BIM or cloud platforms. | Implement data encryption, access controls, and secure storage; follow company cybersecurity protocols. |
Case Studies, Factory Retrofit & Automation Projects
Ground implementations of 3D laser scanning showcase its practical value in factory settings.
- Siemens Energy employs HandySCAN 3D|MAX Series at their Mülheim facility to scan components as large as 14-meter turbine rotors with exceptional precision. Their maintenance teams work quickly in challenging environments that have temperatures reaching 120°F, constant vibrations, and tight spaces.
- Acensium’s partnership with Georgia Power tackled a complex fuel pipe replacement project at Plant Bowen. The team used laser scanning services within a high-heat environment (120°F ambient temperature) and coordinated with a 141-person crew that worked 7 days per week. The industrial laser scanning data helped avoid approximately 1,500 man-hours of rework.
These examples show how industrial layout scanning cuts downtime, prevents errors that get pricey, and speeds up project timelines. To cite an instance at Plant Bowen, a single incorrect pipe joint would need 22 man-hours to reweld and 12 man-hours to rerig.
Conclusion
3D laser scanning is redefining the foundation of manufacturing intelligence. Its integration into modern production doesn’t merely enhance accuracy, it reshapes how factories think, plan, and execute. Precision has evolved from being a performance metric to becoming the very language of manufacturing efficiency.
What stands out is the shift from reactive to predictive operations. With every micron-level scan, facilities gain actionable data that empowers design validation, process optimization, and continuous quality improvement. The convergence of advanced hardware, AI-driven analysis, and real-time visualization marks a transition toward self-correcting production ecosystems.
Beyond measurement, 3D laser scanning symbolizes the era of digital truth in manufacturing. It eliminates guesswork, bridges design with execution, and unifies multidisciplinary teams under one data reality. As more companies leverage these systems, the competitive distinction will no longer lie in who scans faster — but in who interprets better and acts smarter.
The technology’s true value lies not just in precision, but in transformation. Manufacturers that invest in robust scanning infrastructure, consistent calibration, and skilled implementation are effectively building the blueprint for the next generation of smart factories, where data defines excellence and every scan drives progress.
Frequently Asked Questions (FAQs):
1. What is 3D laser scanning in manufacturing and how does it work?
3D laser scanning in manufacturing uses high-precision scanners to capture millions of data points on an object’s surface, creating an accurate digital model. This process helps identify microscopic defects, validate designs, and ensure every part meets engineering standards – improving both efficiency and product quality.
2. Which types of 3D laser scanners are used in industrial manufacturing?
Manufacturers use different 3D laser scanners depending on their needs – including structured light scanners for high precision, laser triangulation scanners for detailed inspection, LiDAR systems for large facility mapping, and handheld scanners for on-site measurements and quick verifications.
3. What are the key benefits of using 3D laser scanning in manufacturing?
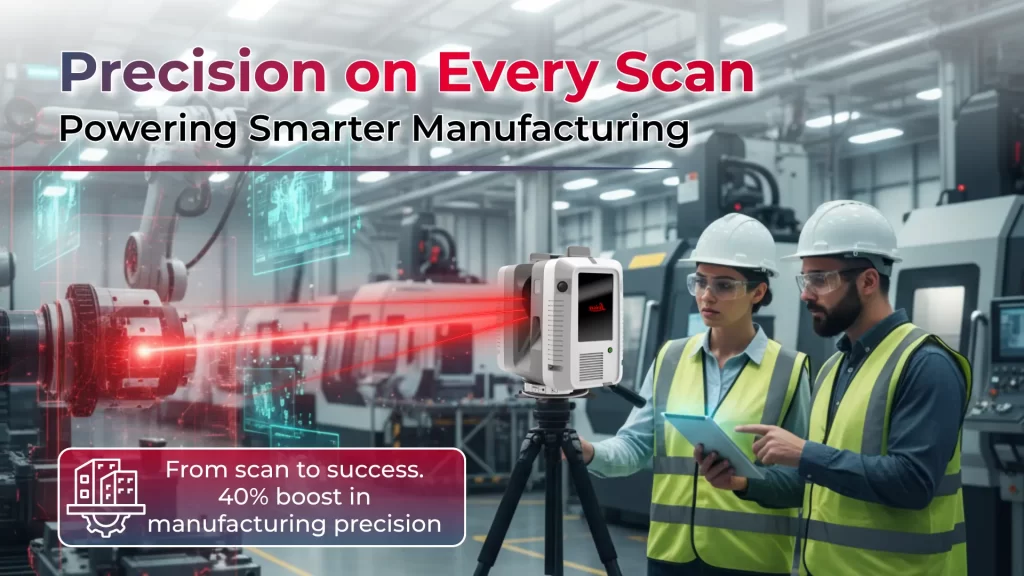
3D laser scanning enhances accuracy, speed, and quality assurance. It minimizes rework, supports reverse engineering, enables digital twin creation, and allows real-time inspection within production lines. Many factories report up to 40% improvement in manufacturing precision after adopting this technology.
4. How does 3D laser scanning improve quality control and compliance?
Modern 3D scanning systems detect defects invisible to the human eye, ensuring adherence to standards such as ASTM E3125-17, ISO 10360-8, and ISO/IEC 17025. Regular calibration, environmental monitoring, and automated reporting further maintain dimensional accuracy and regulatory compliance.
5. How are manufacturers integrating 3D laser scanning into smart factory workflows?
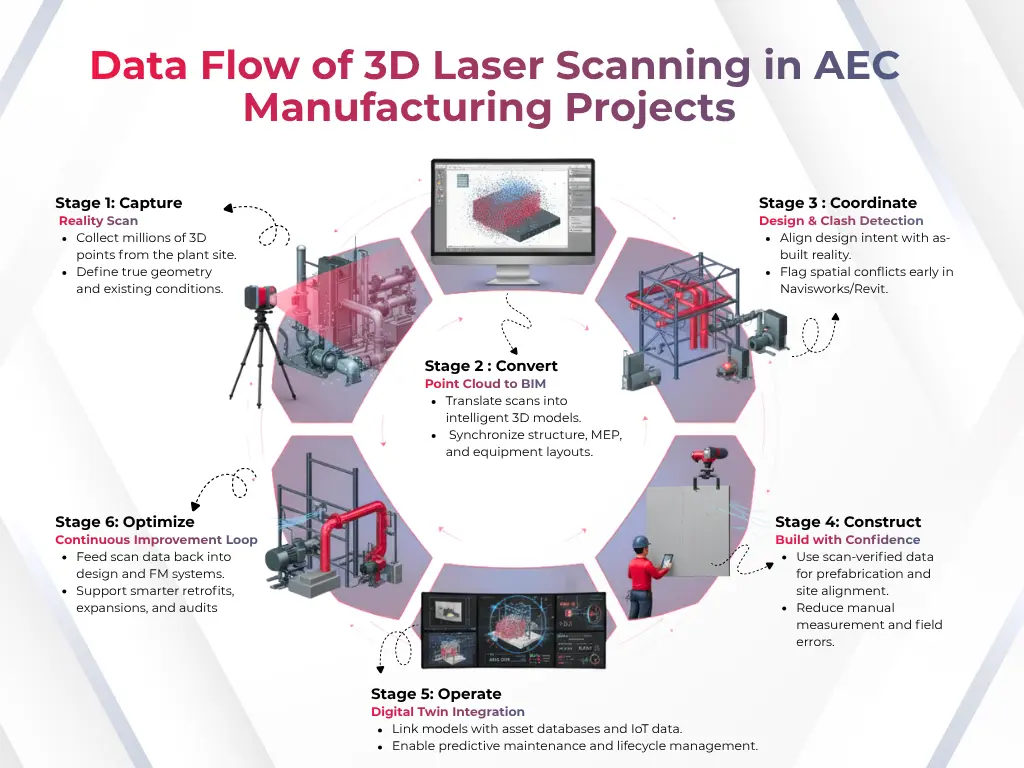
Manufacturers integrate 3D scanning inline or near-line with production systems for continuous quality checks. The data feeds into BIM platforms and digital twins, enabling AI-based predictive maintenance, process optimization, and self-correcting production ecosystems – essential for Industry 4.0 and smart manufacturing transformation.
Further Reading
Comprehensive Guide to 3D Laser Scanning for Oil & Gas
Ultimate Guide to 3D Laser Scanning & LiDAR Scanning
Comprehensive Guide on As-Built Surveys
How to Conduct 3D Laser Scanning in Data Centers and Choose the Right Tools?
Comprehensive Guide to 3D Laser Scanning for Power Plants
How to Use As-Built Surveys in Renovation Projects and Avoid Common Mistakes?
Our Services
Latest Post
Get A Free Quote
BIM Construction is the Future
Building information modeling (BIM) is the future of building design and construction. Get in touch with our BIM Experts.
